phishing

rig library

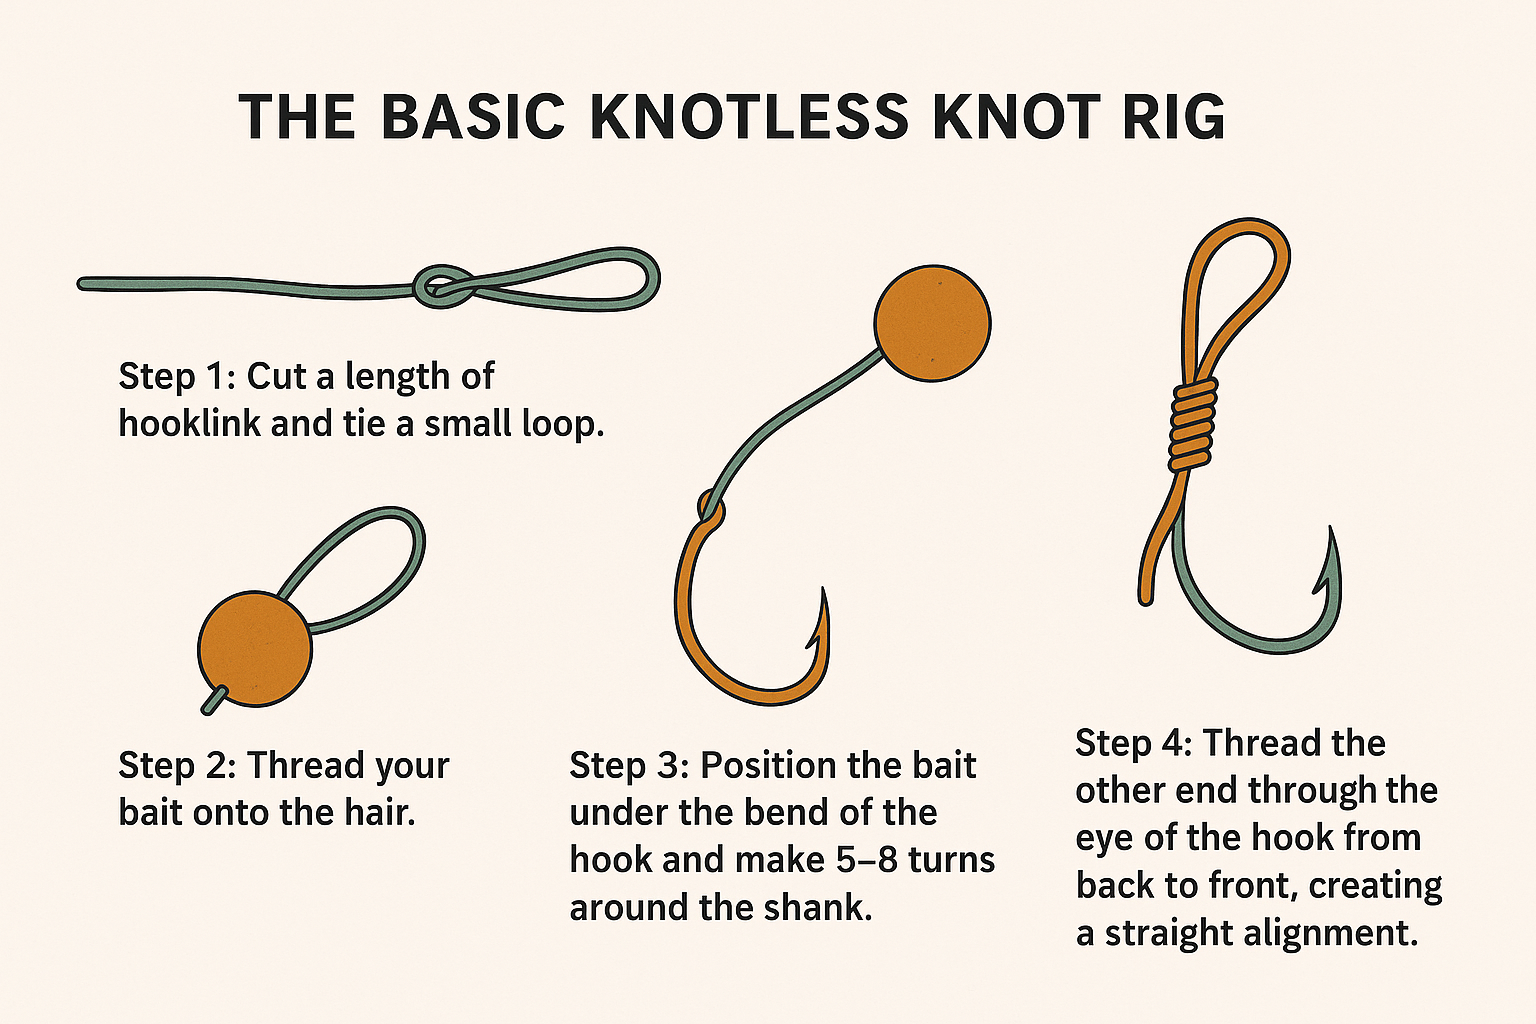
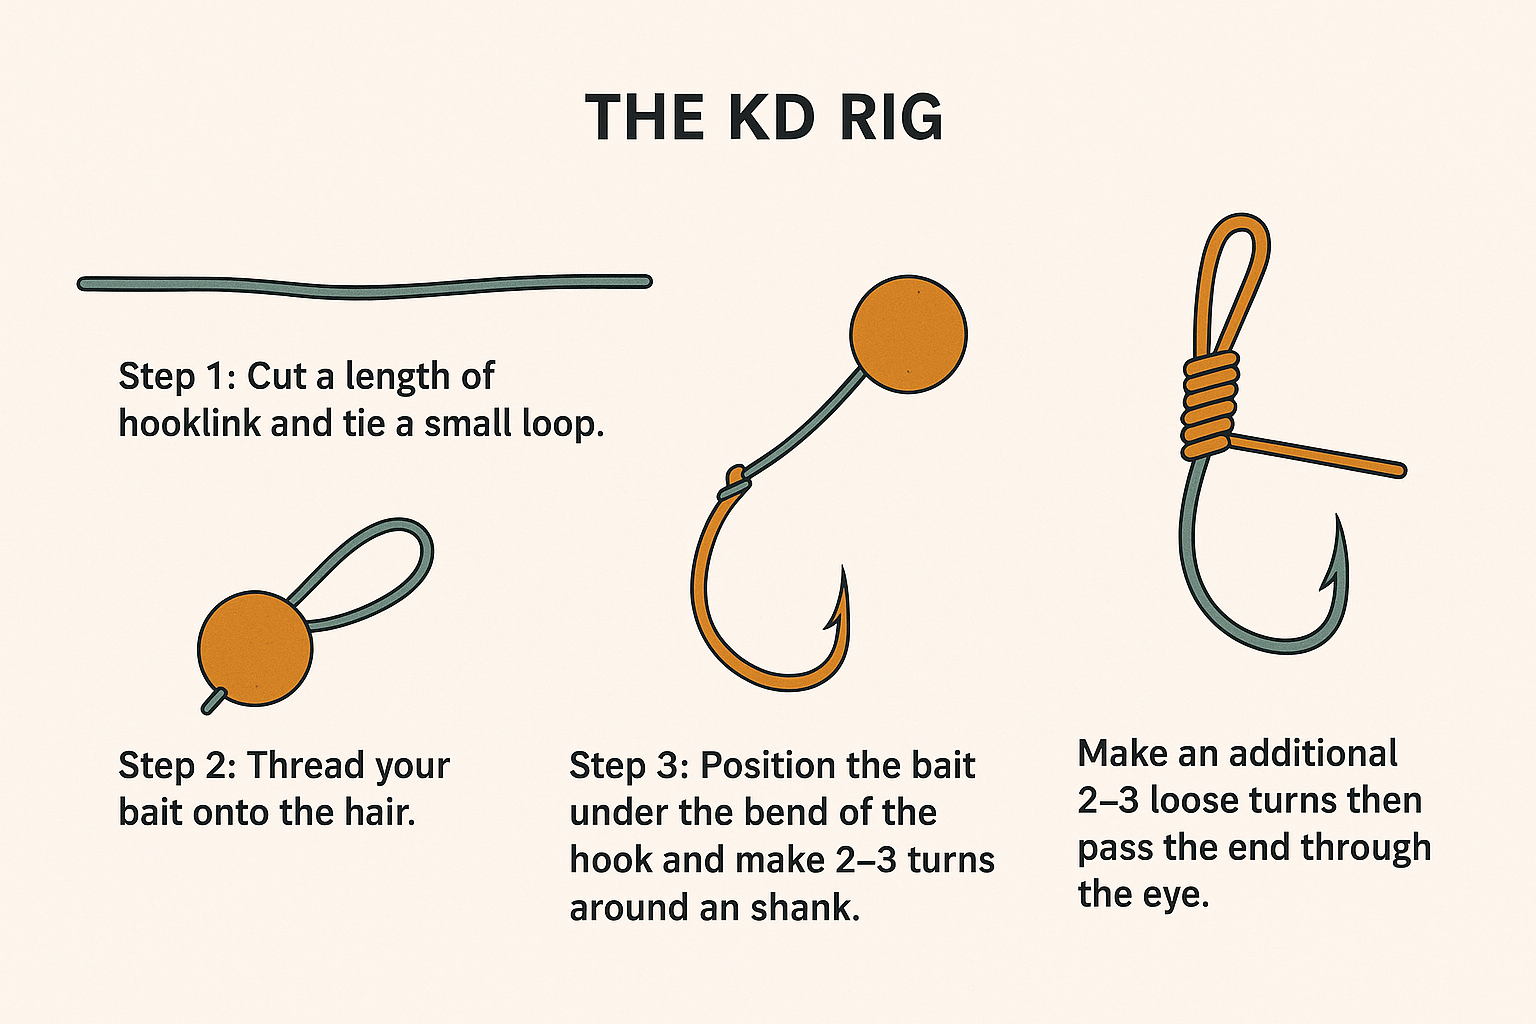
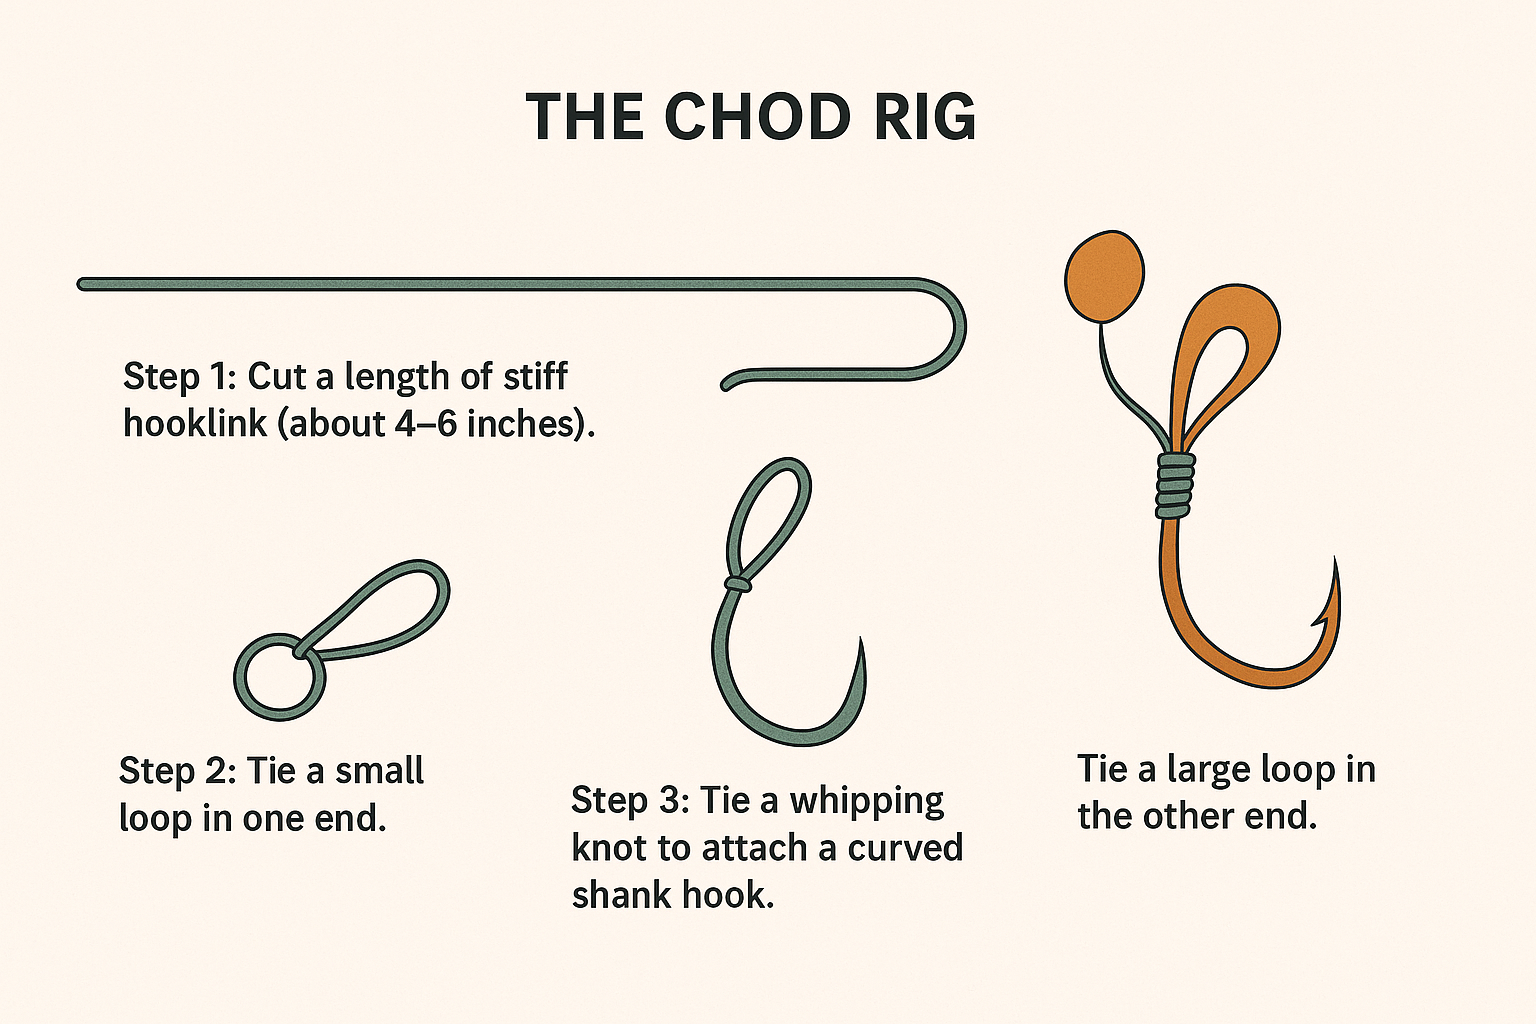
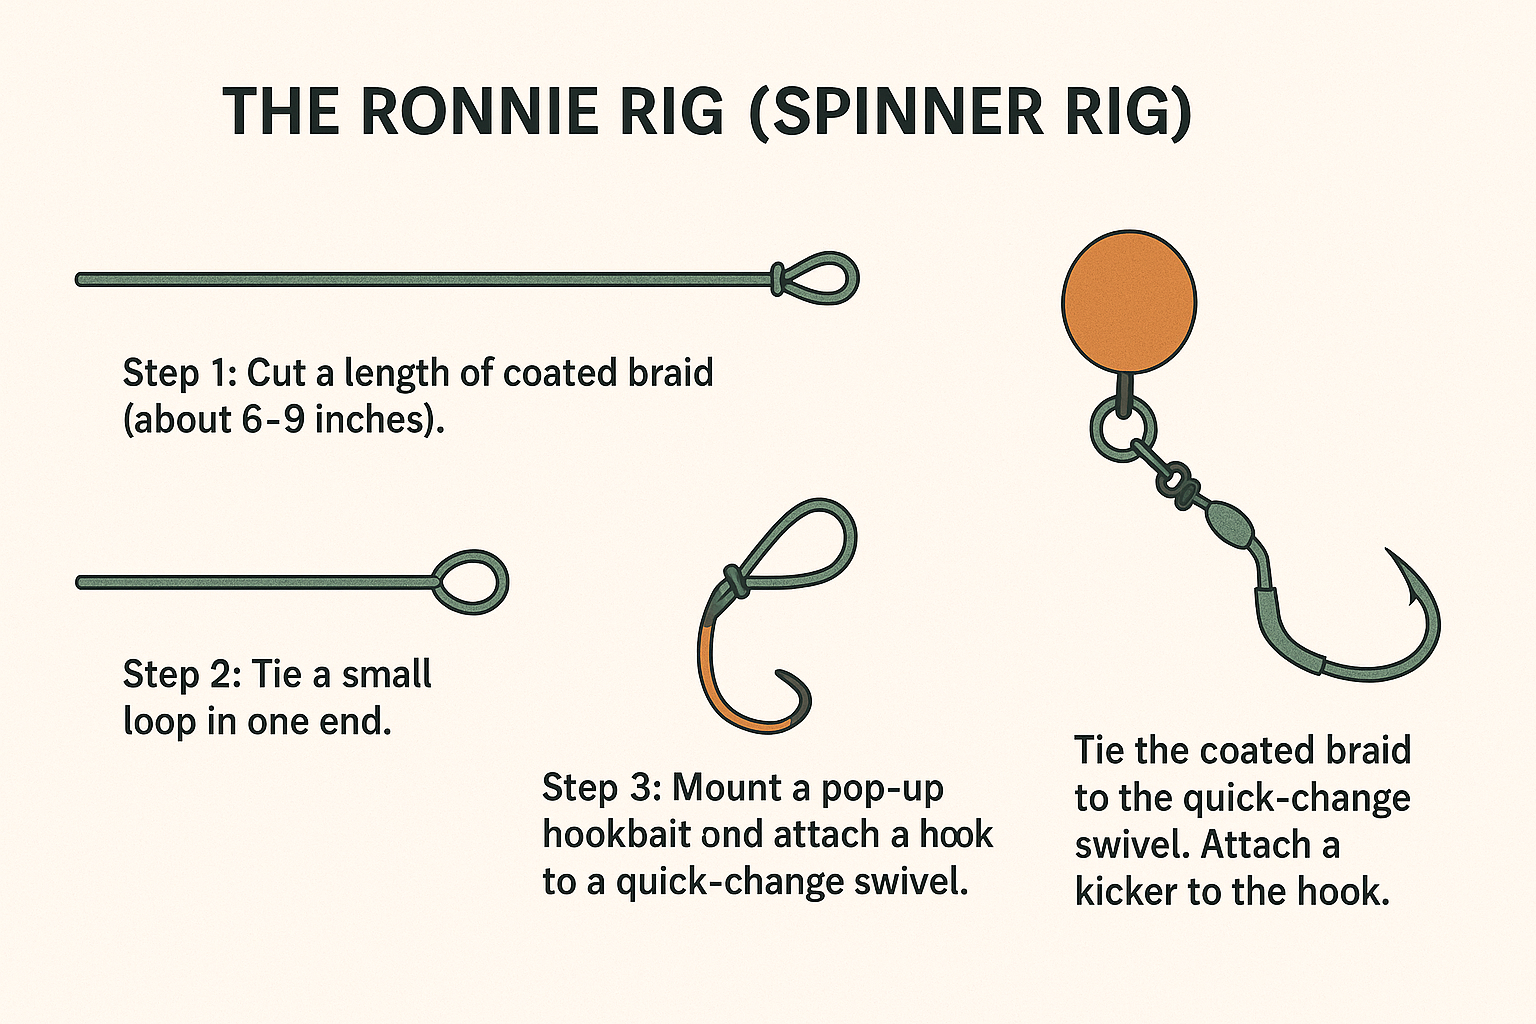
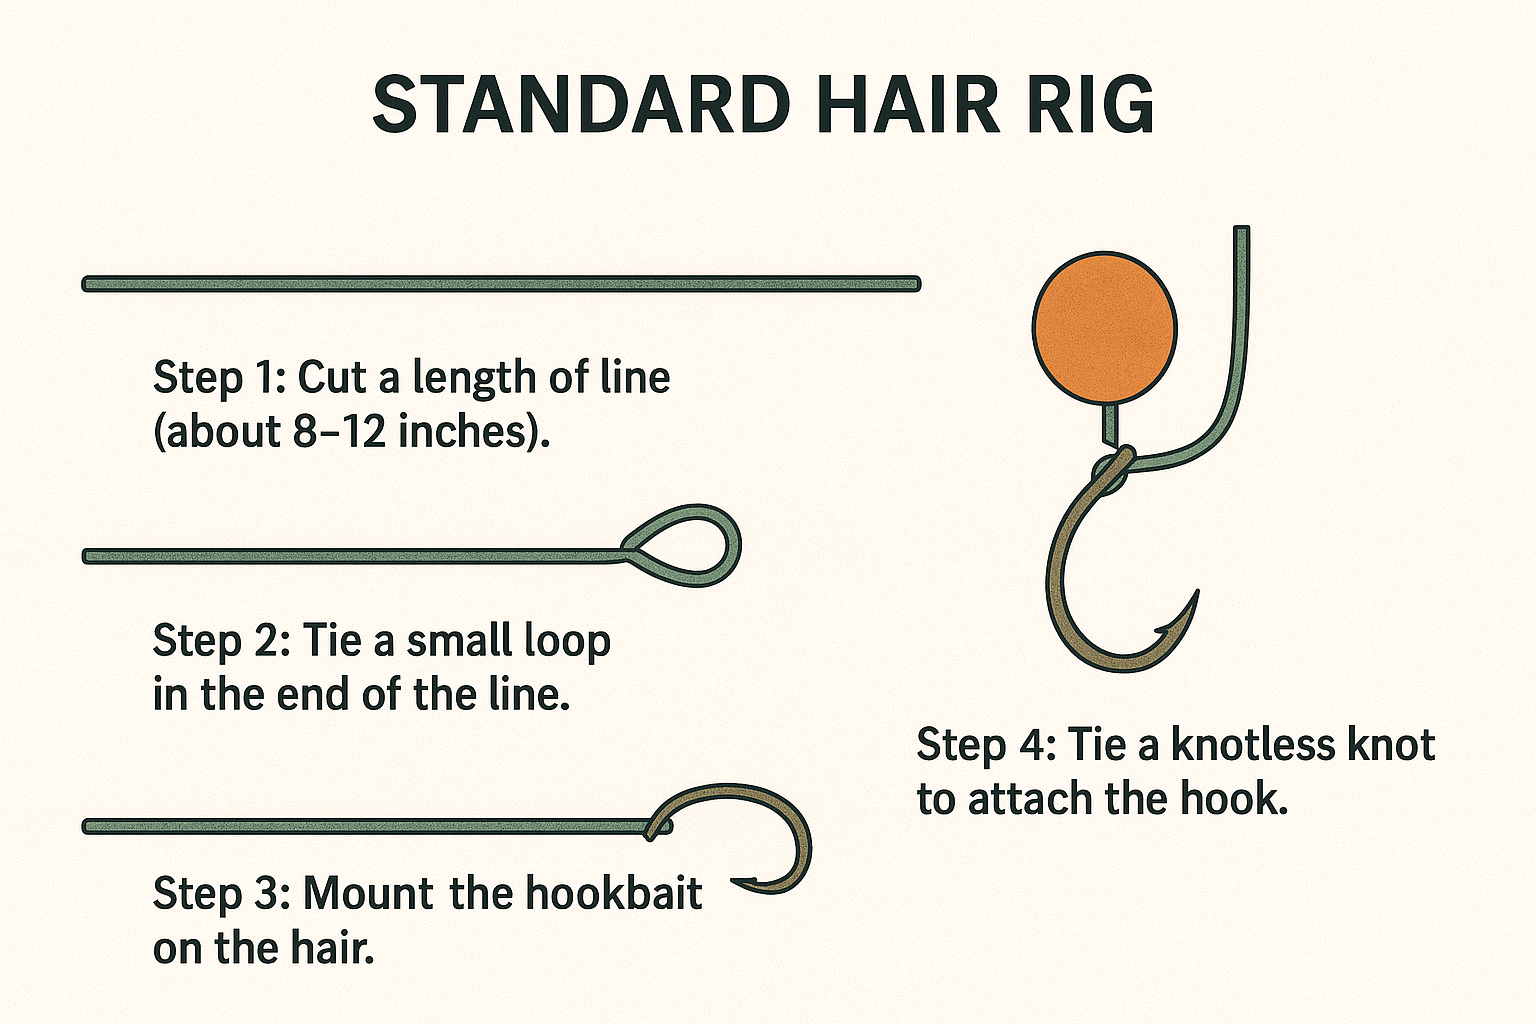
Explore a comprehensive collection of carp fishing rigs. Learn how to tie them with step-by-step guides.

Knot Photo
The Basic Knotless Knot Rig
A simple yet effective rig that is the foundation of many carp fishing presentations.

quick guide:

  • Step 1: Cut a length of hooklink and tie a small loop at one end for the hair.
  • Step 2: Thread your bait onto the hair using a baiting needle.
  • Step 3: Place bait under the bend of the hook and make 5–8 turns around the shank.
  • Step 4: Thread the other end through the eye of the hook from back to front, creating a straight alignment.
Knot Photo
The KD Rig
The KD rig creates a very aggressive hooking angle and is ideal for pop-up presentations.

quick guide:

  • Step 1: Tie a small hair loop and thread on your bait.
  • Step 2: Position the hair to exit just above the hook bend.
  • Step 3: Make several tight wraps away from the bend, leaving space near the eye.
  • Step 4: Thread the tag end through the eye of the hook to lock the KD curve.
Knot Photo
The Chod Rig
A great rig for fishing over debris or weed, presenting a pop-up perfectly.

quick guide:

  • Step 1: Cut a short stiff section of chod filament and form a loop at one end.
  • Step 2: Tie on a pop-up using a micro ring swivel or bait screw.
  • Step 3: Attach the hook using a whipping knot to maintain a curved shape.
  • Step 4: Use rig rings and beads to allow it to slide on the leader or helicopter setup.
Knot Photo
The Ronnie Rig (Spinner Rig)
Highly popular rig that offers 360° movement, ideal for wafters or pop-ups.

quick guide:

  • Step 1: Attach a hook to a spinner swivel using a quick-change hook adaptor or shrink tubing.
  • Step 2: Add a kicker or sleeve to maintain angle and hide the swivel.
  • Step 3: Thread on your pop-up using bait screw or micro ring.
  • Step 4: Tie the rig to your boom section and attach a sinker to balance the bait.
Knot Photo
Hair Rig
The Hair Rig revolutionized carp fishing, allowing bait to sit off the hook for better presentation and increased hook-ups.

quick guide:

  • Step 1: Cut a length of hooklink and tie a small loop at one end.
  • Step 2: Thread your bait onto the hair using a baiting needle.
  • Step 3: Position the hair alongside the shank of the hook.
  • Step 4: Tie a knotless knot to secure the hook and hair.
Knot Photo
Blood Knot
Used to join two lines of similar diameter, the Blood Knot is reliable and slim, ideal for leader connections.

quick guide:

  • Step 1: Overlap the two lines by several inches.
  • Step 2: Twist one tag end around the other line 5–6 times and tuck it between the lines.
  • Step 3: Repeat with the other tag end.
  • Step 4: Moisten and pull both standing lines to tighten.
Knot Photo
Albright Knot
Great for joining lines of different materials or diameters, such as braid to mono.

quick guide:

  • Step 1: Create a loop in the thicker line (usually mono).
  • Step 2: Pass the thinner line (braid) through the loop.
  • Step 3: Wrap the braid around both strands of the loop 10 times.
  • Step 4: Pass the tag end back through the loop and tighten.
Knot Photo
Non-Slip Loop Knot
Creates a strong loop that allows natural bait movement, ideal for lures or hooks.

quick guide:

  • Step 1: Tie an overhand knot in the line, leaving a long tag.
  • Step 2: Pass the tag end through the hook eye.
  • Step 3: Run the tag end back through the overhand knot.
  • Step 4: Wrap around the standing line and pass back through the loop. Tighten.
Knot Photo
D-Rig Knot
The D-Rig offers superior bait presentation and hook movement, often used with pop-up boilies.

quick guide:

  • Step 1: Tie a figure-eight loop on stiff hooklink material.
  • Step 2: Pass the loop through the eye of the hook and add a rig ring.
  • Step 3: Pull the loop over the hook point to form the D.
  • Step 4: Secure the hook to a swivel using a knotless knot.